
Installing a Diesel Heater in the Caravan
Getting your caravan ready for Winter weather where the temps are in the negatives and you’re camping ‘Off Grid’? We decided to install a diesel heater. This is how did it.
Hi Guys, Ben here. We’re heading down south at the end of June to Flinders Ranges & we’ll do some of the South Australia coastline & Great Ocean Road before popping up through the Snowy Mountains & alpine region.
We’re currently preparing our van for our upcoming winter escape & we’ve decided to install a diesel heater. I’ve been thinking about this for a long time. Initially, I was ready to go ahead and purchase a whiz bang European one and have it professionally installed, but after considering how often it would be used, I decided to give a Chinese branded copy diesel heater a go. I won’t tell you exactly which one I went for, as there are a huge number available through eBay, but what I did want was a 2kW heater, as I have heard these smaller heaters have lots of advantages over their larger counterparts. For example, I’ve heard they are better running flat out to keep them from sooting up. I’ve also heard that the 5kW systems generate far too much heat for a 20 foot van. I’m not sure if any of that is true, but I’ve gone with it. After a wait of about 10 days, the unit arrived well packaged and all necessary components were in the box! That was certainly a great start. I installed it a couple of weeks ago and all up it took about 8 hours. I’m not completely useless on the tools, but it really was very simple.
I spent a long time deciding on where to mount the unit (we have a Jayco Expanda Outback 20.64). I wanted it to be able to heat the back end of the van where the kids sleep, as well as the front end where we sleep, but still wanted to keep the concertina door closed at night. At first, I was going to put it under the slide-out lounge with the batteries, or under the fridge - both of which would have worked fine, but then I realised the bottom of the ensuite vanity is never used and would allow the ducting to blow heated air into both areas of the van separately. The other advantage of where I chose, is that under the van has the perfect amount of space to allow the exhaust and intake vents to be mounted without obstructions getting in the way, like water tanks or gas lines. Even though the vanity space was a little tight, it fit perfectly.
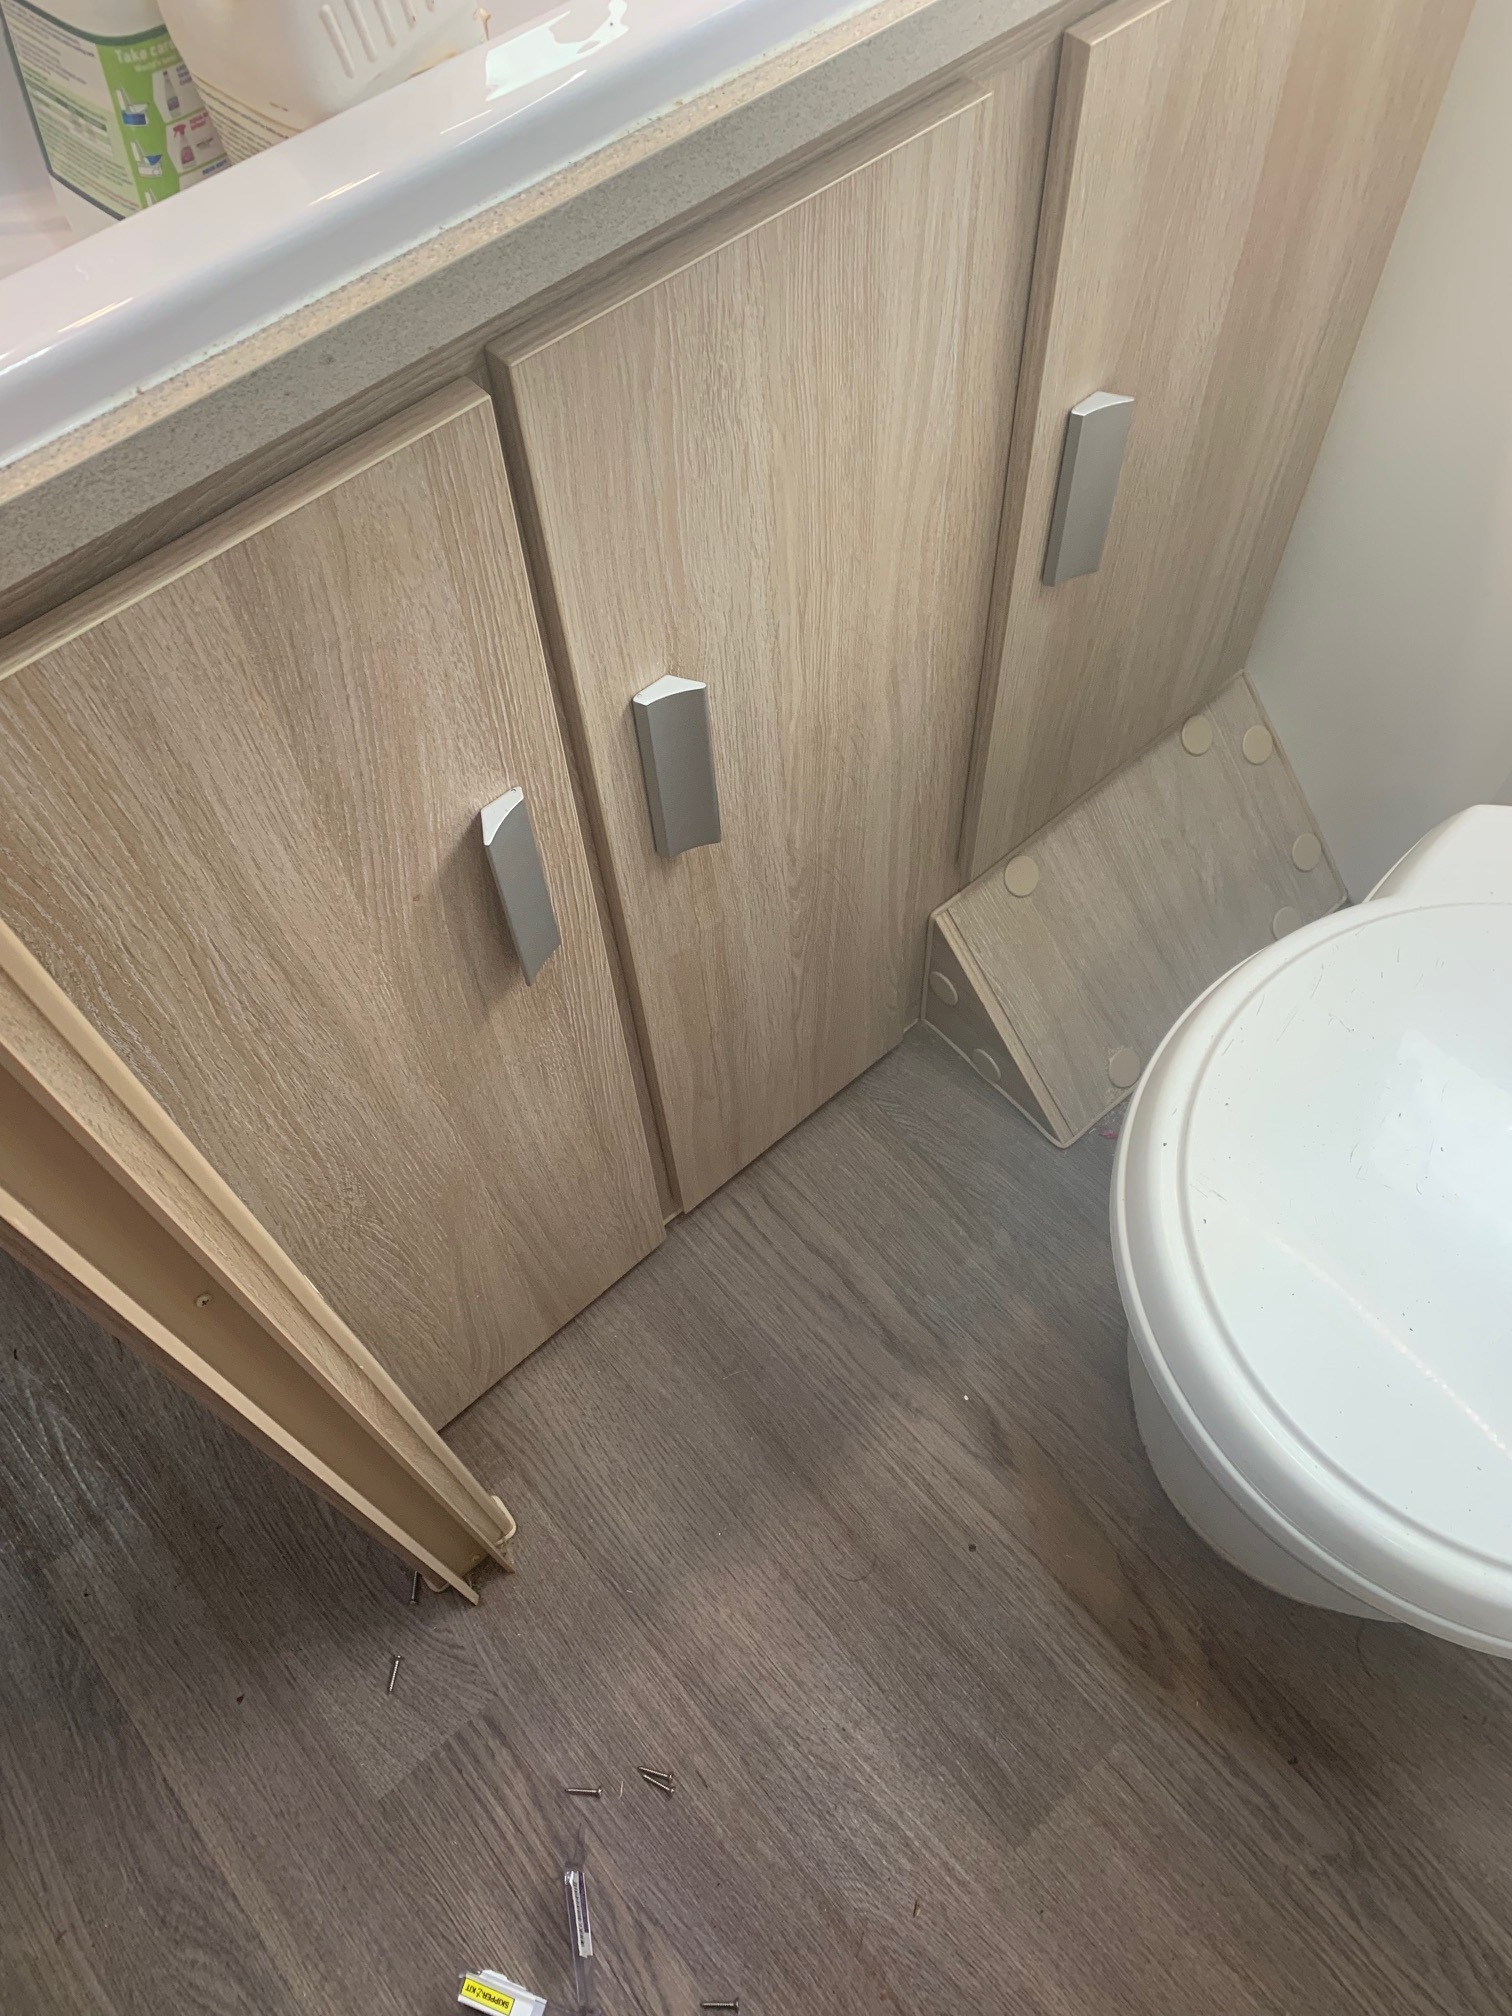
We chose to put the unit on the floor of the bathroom vanity cabinet.

So I thought I’d take you through just how simple the installation process was. The hardest part really was deciding on which unit to buy, and where to mount it. Once that was decided, the rest just fell into place.
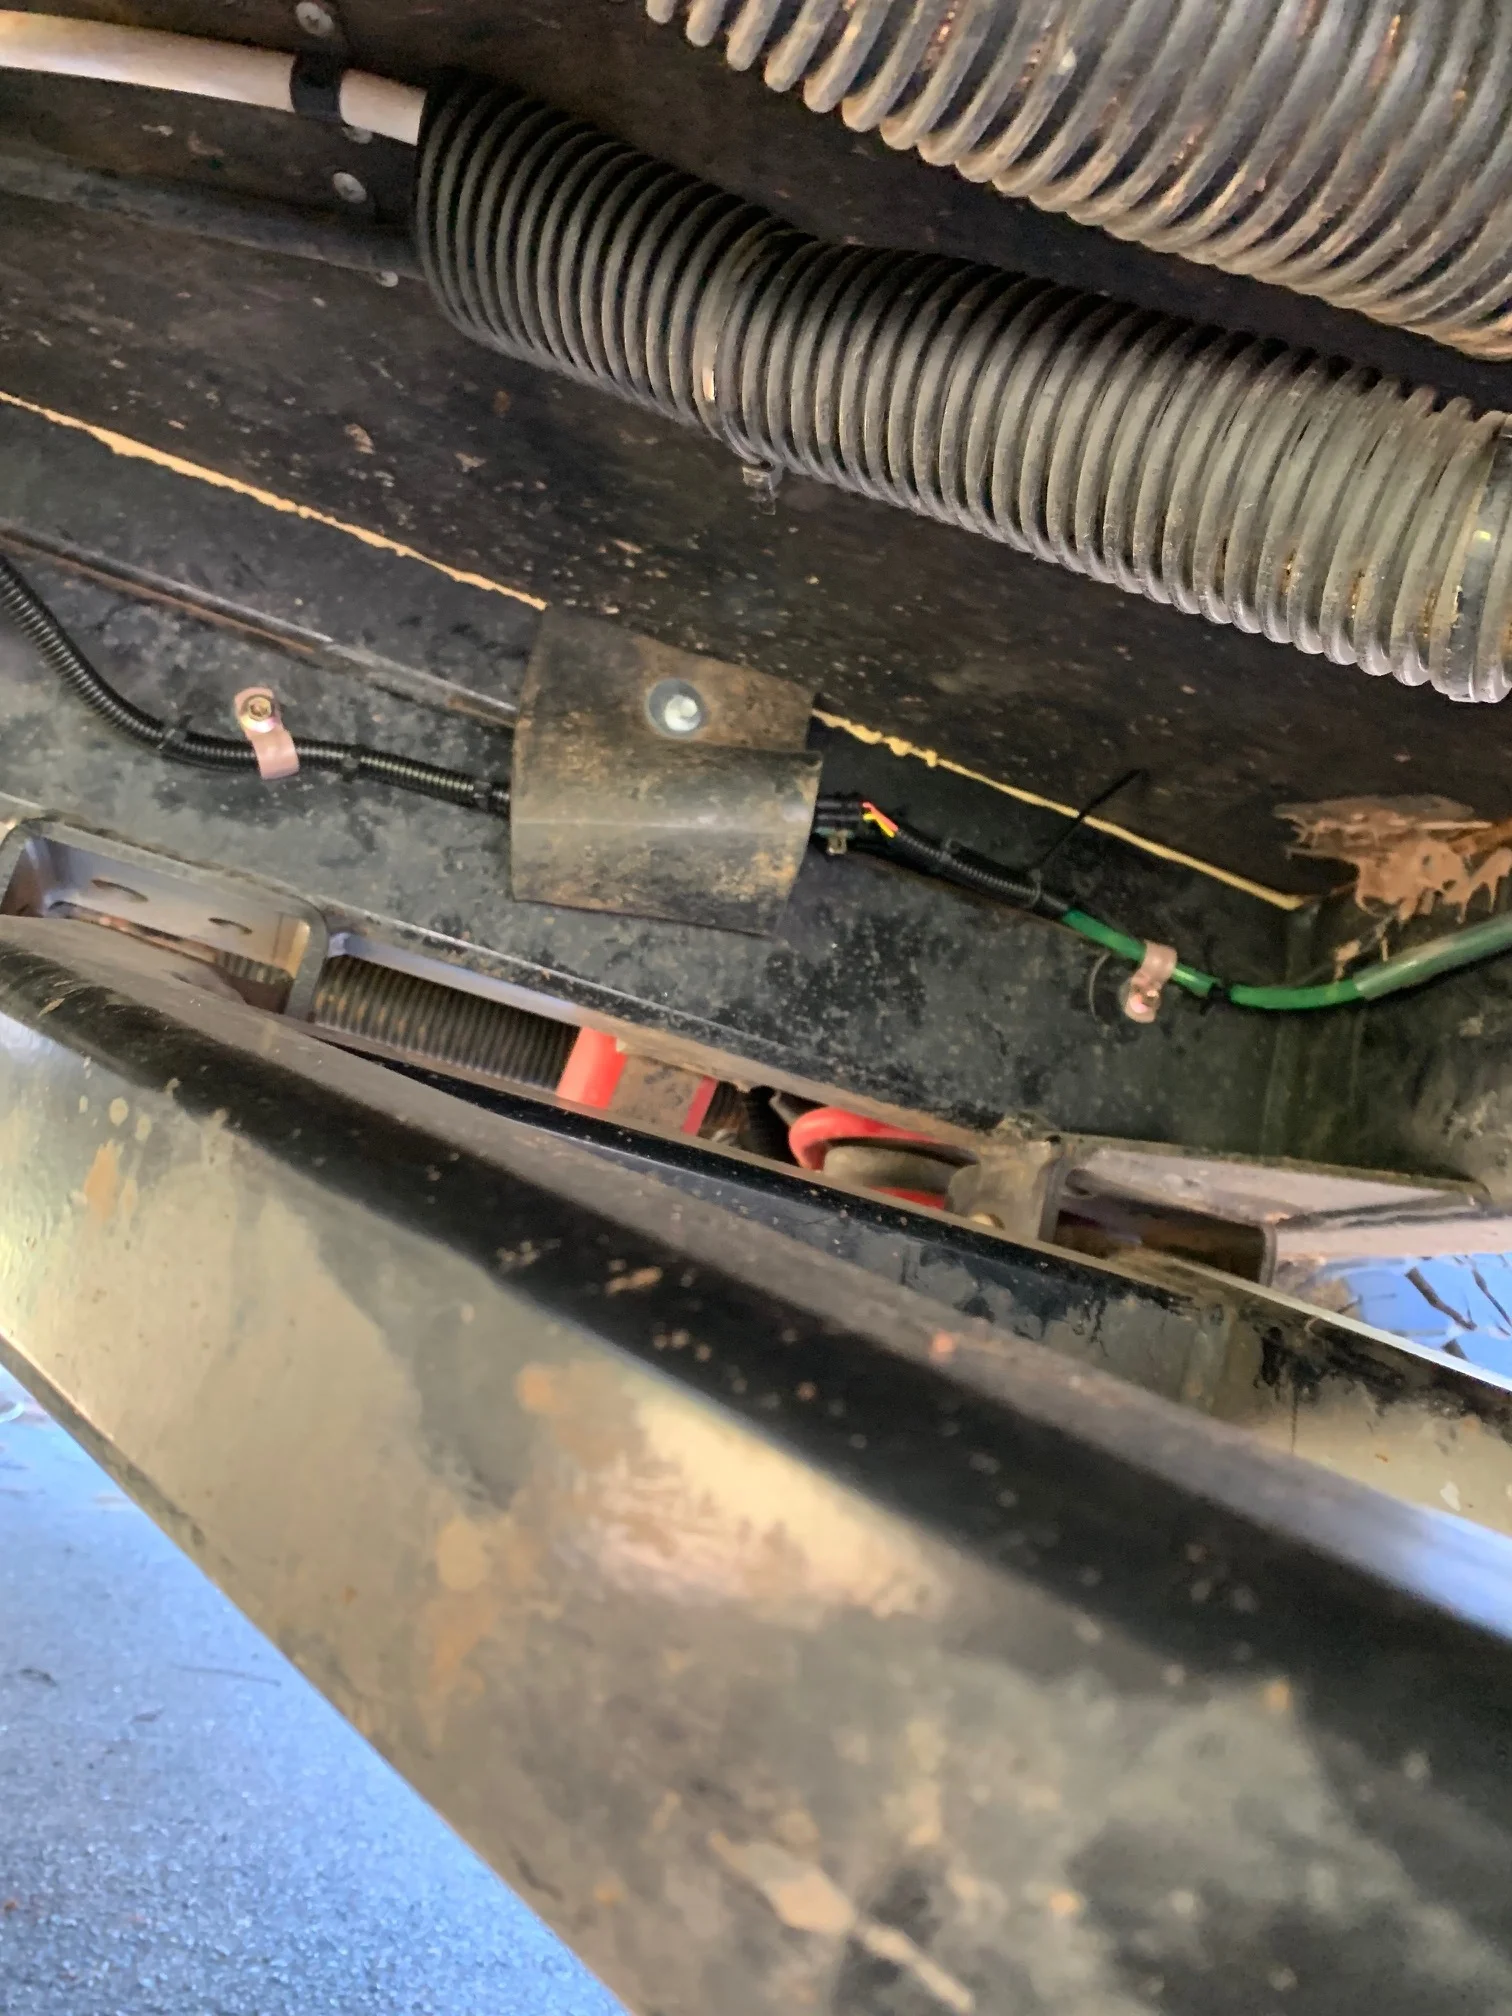
We were are lucky with our van that there is a lot of dead space under the cupboard along the fridge and slide-out side of our van. That made running power lines to our batteries simple.
First up, I measured up the size needed to drill through the floor to accommodate the exhaust and air intake and fuel lines. I drilled two holes with a Hole Saw next to each other, and cut out the wedge in between with a Jig Saw to make an oval hole. I then placed the mounting bracket over this, and used Sika-flex to hold it in place, with a couple of screws for good measure. Bolts would have been better, but access was tight in the vanity. I then placed the heater on top of the mounting bracket, with the exhaust and air intake pipes already fixed to the unit. I bolted it to the mounting bracket using the supplied bolts. I also cut a hole through the side wall of the vanity for the air intake for the heater itself - that way, it sucks fresh air in from the void space behind the cabinetry. That was the hard part done!

Air intake from void space. Power cables run through the same void to the battery in the slide-out.
I mounted the diesel fuel tank to the stone guard using a piece of aluminium checker plate. I have previously had a full dirty gear bag mounted to the stone guard and driven over 10,000 km on corrugated roads, so I think it’ll hold up to the extra 10kgs or so. I have subsequently painted the checker plate (for aesthetics), and the diesel tank (with UV protective paint). I ran the fuel line from the tank along the chassis rail and enclosed it in a slightly larger piece of clear plastic hose and then split corrugated tubing for stone protection. I mounted the fuel filter safely behind a cross beam and the fuel pump further down the line at an angle of about 30 degrees. The fuel pump has been mounted with the rubber mount supplied, but in addition, I used a piece of flat 4mm rubber I had lying around as sound proofing and for stone protection. The fuel pump is about 1m from the heater unit. Unfortunately, the supplied fuel line is rubber, about 4mm internal diameter, rather than the stiff plastic line that is about 2mm internal diameter. Hopefully it holds up, but that is the reason I mounted the pump closer to the heater, to minimise the amount of pressure lost in the fuel line after the pump due to the rubber line stretching.

I painted the diesel tank with UV Paint to protect the UV sensitive plastic. I mounted it to a piece of checker plate on the stone guard.

Fuel line from tank.

Fuel line running within hosing to good quality fuel filter. The fuel line then runs back to the pump, protected with clear hose along its length.

Fuel pump mounted at about a 30 degree angle, with rubber sheeting for sound minimisation. Power cable for pump comes through the floor (on the right of the pic).

Fuel line, air intake and exhaust run into the heater unit just above the suspension bracket. A neat fit.

Air intake mounted behind cross beams, well protected.
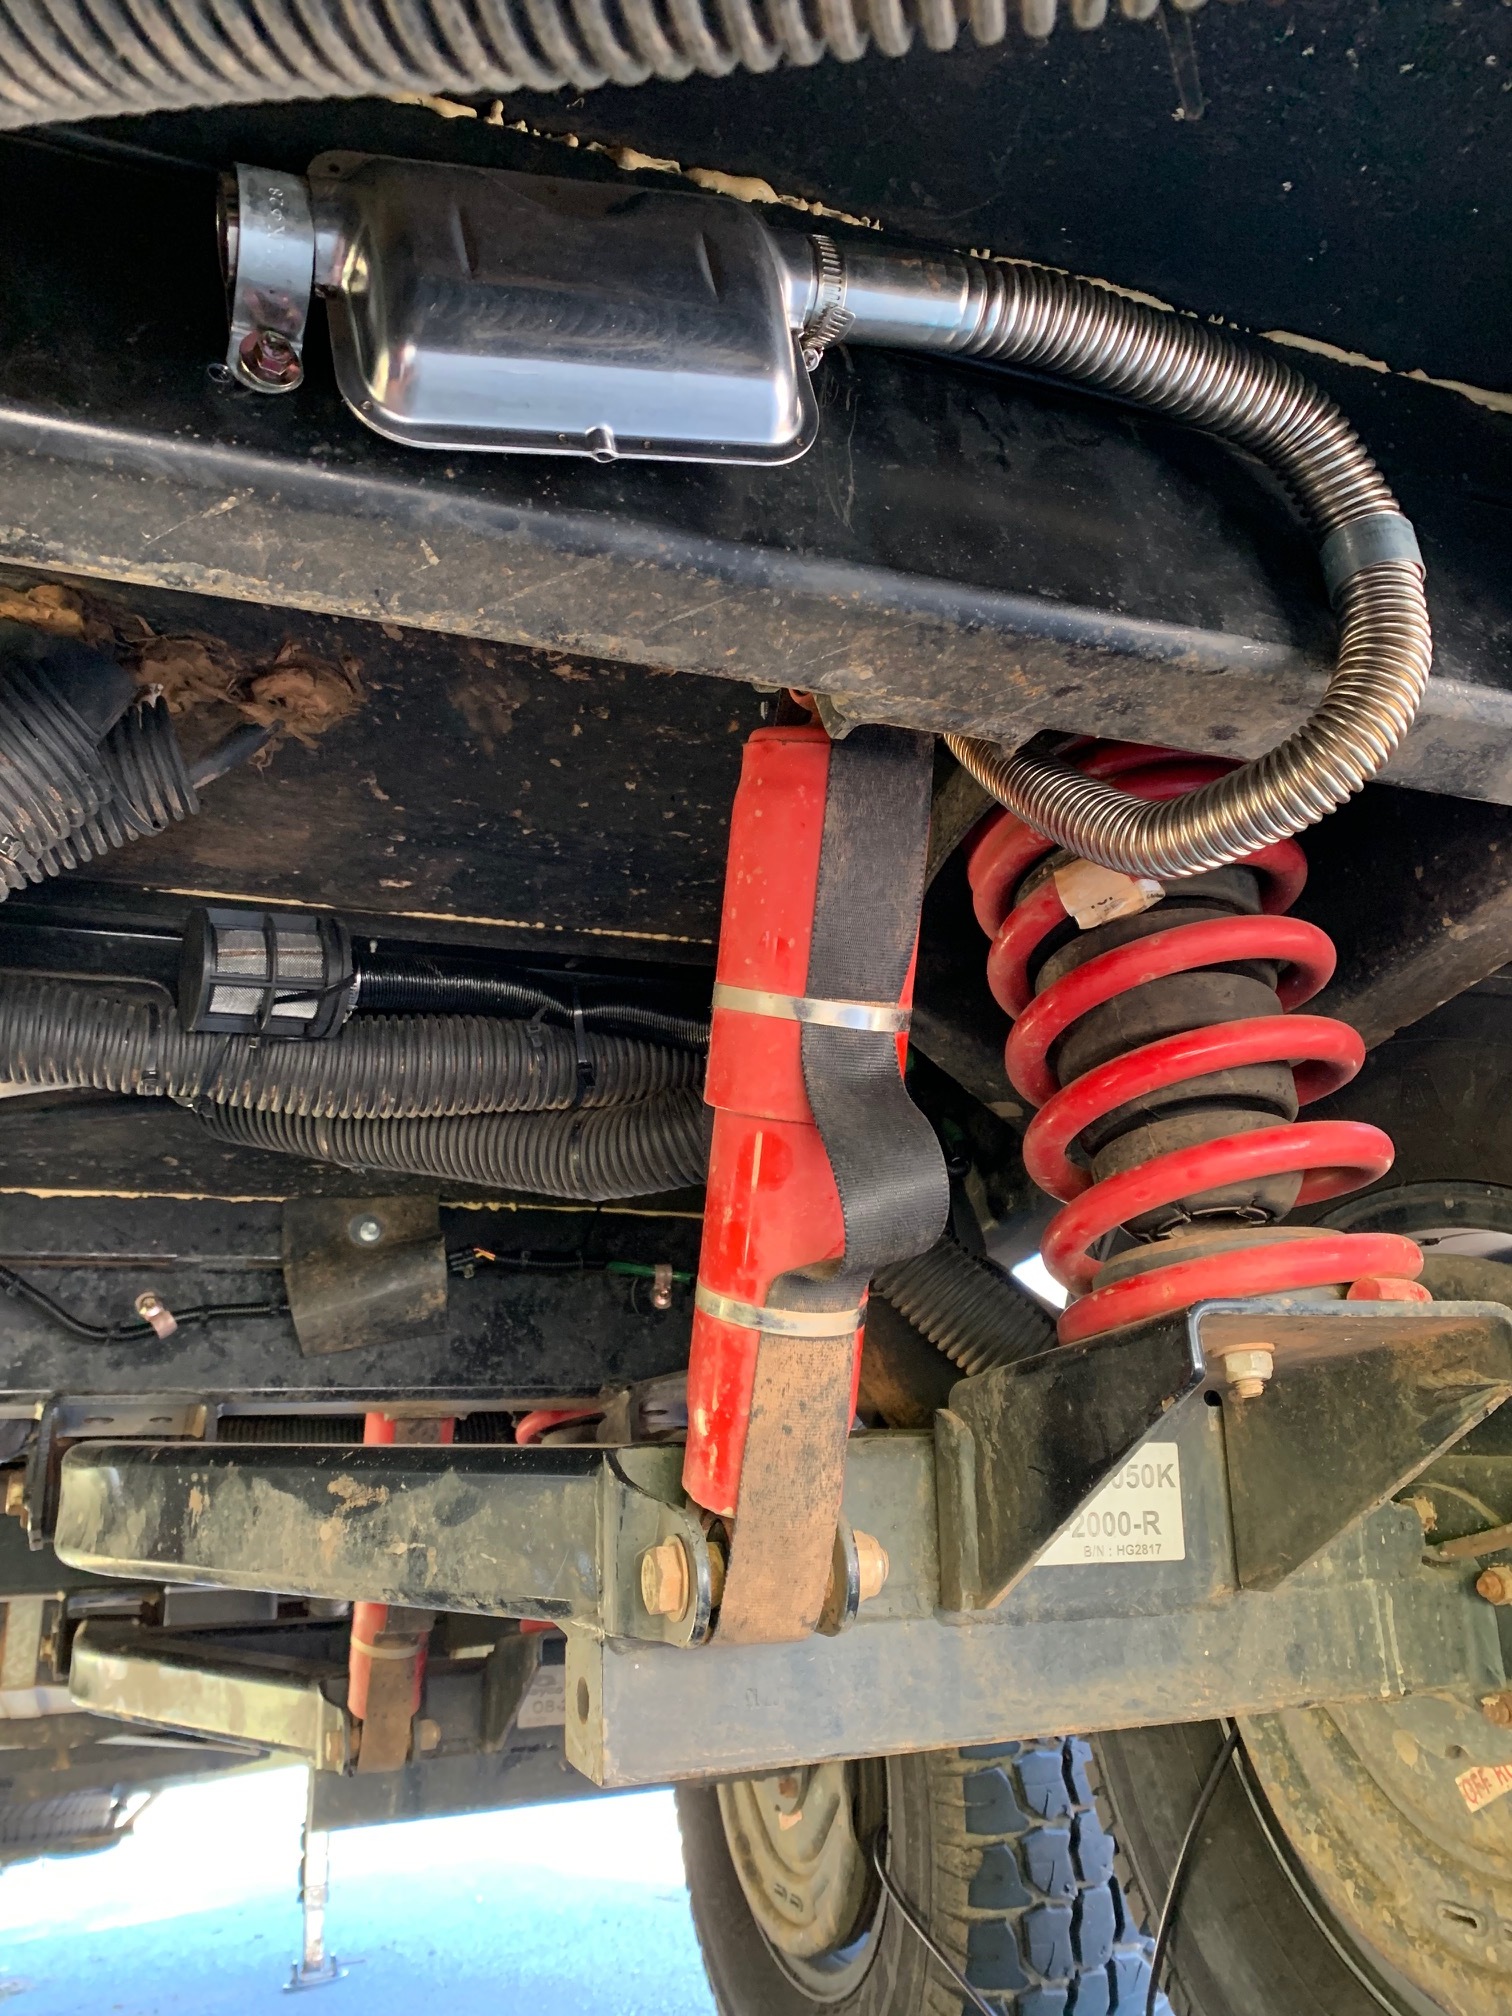
Exhaust mounted high up, clear of anything flammable or at risk of melting.
The heater ducts and vents were easy to connect, but the space was tight. The worst part was drilling two large holes into the walls to accommodate the vents - I didn’t want to make a mistake and damage the wall! I measured, then measured again. I used masking tape where I made the cuts, to prevent the paneling splitting, and to absorb some of the Hole Saw should I slip (which I didn’t).

These are the vents - installed and directed towards both living areas.

It was a tight squeeze, but the heat vents plumbed in fairly easily. I had to move the water lines on the back wall for access.
The heater comes with a really cool LCD display unit. I wanted that mounted high, in the control panel above our fridge. All our other controllers are housed in the same space. The rear of that space is an internal wall, and we always have that door open when we are using the van, because I like to keep an eye on power, water levels etc, so the temperature sensor in the base of the LCD panel should be an accurate measure of the cabin temperature. To get power to the panel, I ran the Hole Saw up through the front left corner of each of the shelves in the cupboard, next to the fridge and ran the power cable through that, to the LCD panel.

Power cable for LCD display running up through cupboard next to fridge.

LCD display unit mounted to control panel above fridge.
Then, I started connecting the power. First, I plugged in the heater, then the pump and finally the controller. Then I connected the cables to the battery. What do you know! It powered up first go! We fired it up this morning, and for such a small unit it packs a lot of heat!
A few things I learned along the way -
Ideally, you should do a bench test to check the unit before you go to all the effort of installing it. I was lucky, but had no idea if it would work until it was fully installed.
The instructions are rubbish! Use YouTube for everything, including how to prime the fuel line, how to use the LCD panel and change the settings, and how to manage error codes.
Measure twice. I made no mistakes, but it would be very easy to do.
I changed the hose clamps from the ones supplied to ones that were wider and had more strength to them - the exhaust pipe in particular needs a really strong clamp, and the supplied clamps were too flimsy.
We really recommend it if you camp off grid a lot & want to warm the van up in the Winter months. Cheers!